Getting started on Bob Go
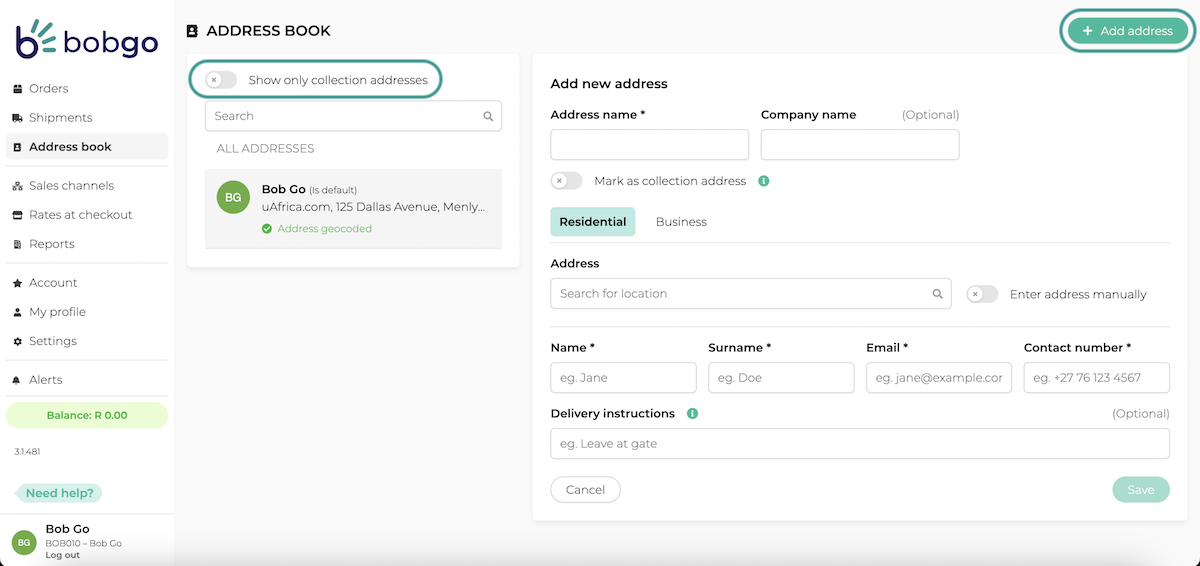
To create an address, navigate to address book in the left navigation panel. In the panel on the right, you can add your addresses and use the toggle function to mark the address as a collection address. If you do so, you can add the advanced setting information as required for all collection addresses, including an address-specific collection note and logo. A collection address can also be marked as “default”, which is the address the system will always revert to. You must have one default collection address in order to complete shipments.
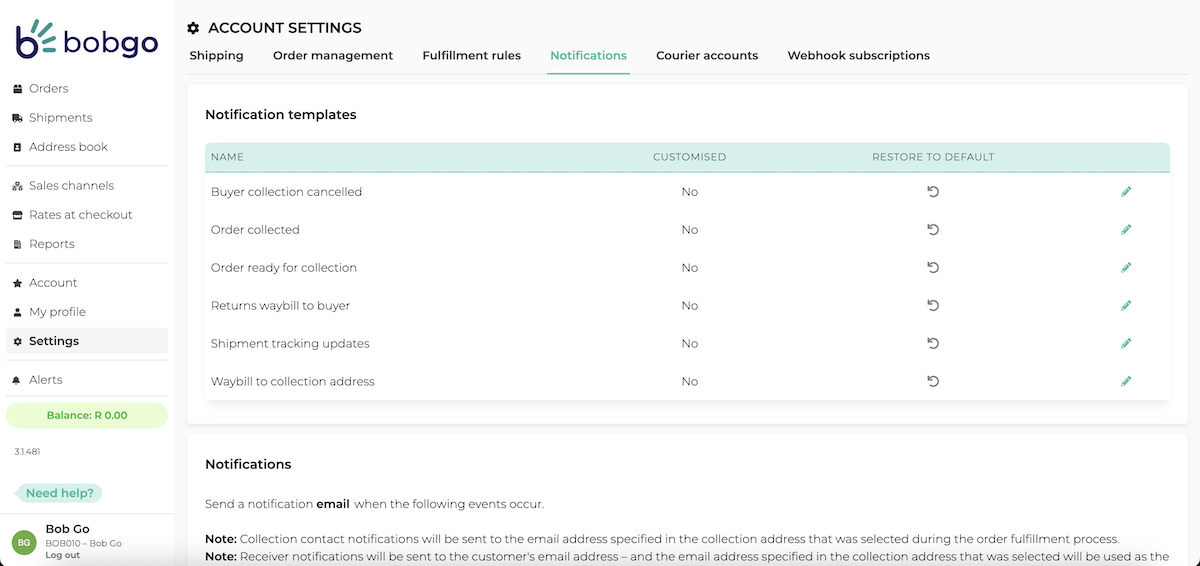
Edit and customise the emails that are sent to your customers as their parcel goes through the delivery process. Navigate to settings in the left navigation panel and select notifications in the the top menu. You will be able to see the notification currently set up, with an indication of whether or not they have already been customised. You can use the arrow icon restore the default template or the pencil icon to edit the template. The editor modal is simple and easy to use, with placeholder functions to customise your notifications. Once you have made the required changes, you can either test send a test email or save the template.
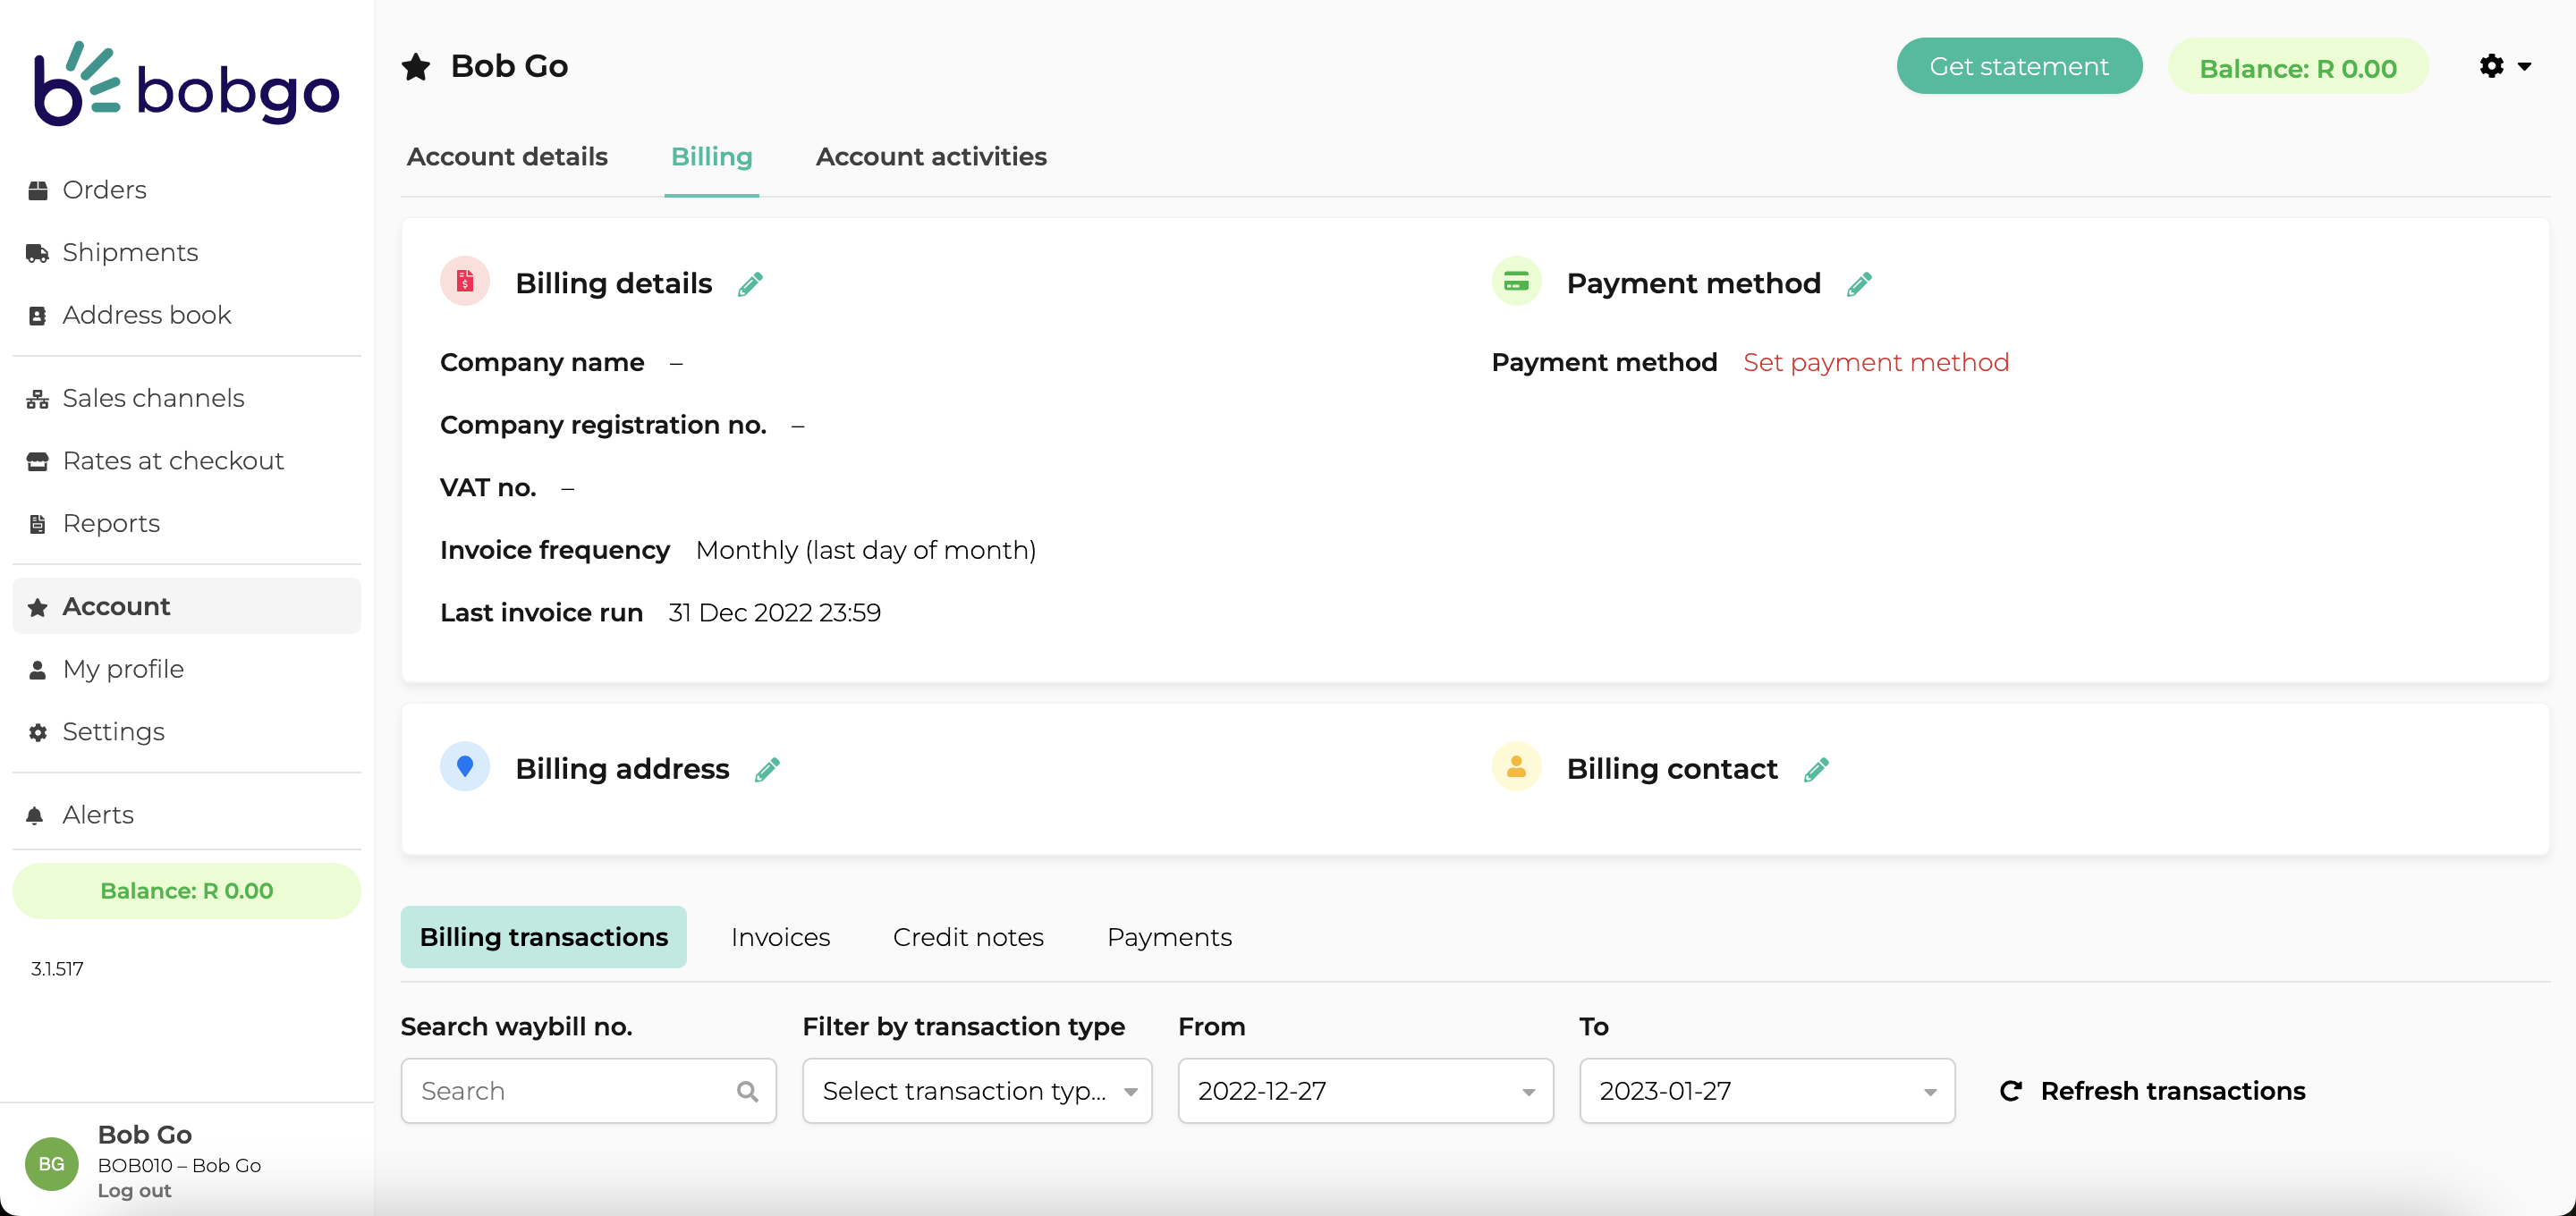
Add your billing details, set up your payment method and top up your account before you start shipping. Navigate to account in the left navigation panel and set up your details in the billing tab.
Related Articles
Bob Go - Setting up user roles
Control what each team member in your team can see on Bob Go by setting up user roles. Currently, there are two roles available – the Account SuperUser and the Account User. The SuperUser is the creator of the Bob Go account or a user with access to ...What Bob Go plan should I pick?
It is important to note that you benefited from Gold plan rates on your trial account. So, if you decide to sign up for the Blue, Bronze or Silver plan, the discounts on shipping rates would be less than what you experienced on the trial account. The ...Bob Go - Import order notes
SHOPIFY Order notes will import into Bob Go automatically from Shopify. WOOCOMMERCE Import order notes made on your WooCommerce sales channel to the order details on Bob Go on a per order basis. This option is located in the settings of each order.Bob Go - How to set up and edit your notification templates
This is a setting with which you can really customize your customer experience. Here you can edit all of the emails that are sent to your customers as their parcel goes through the delivery process. To set up or edit your Notification Templates, ...Processing a return in Bob Go
To create a return in Bob Go, navigate to Orders and find the order you would like to generate a return for. Open the order by clicking on the order number and click on “Create Return”. You will need to accept a confirmation of the return in order to ...